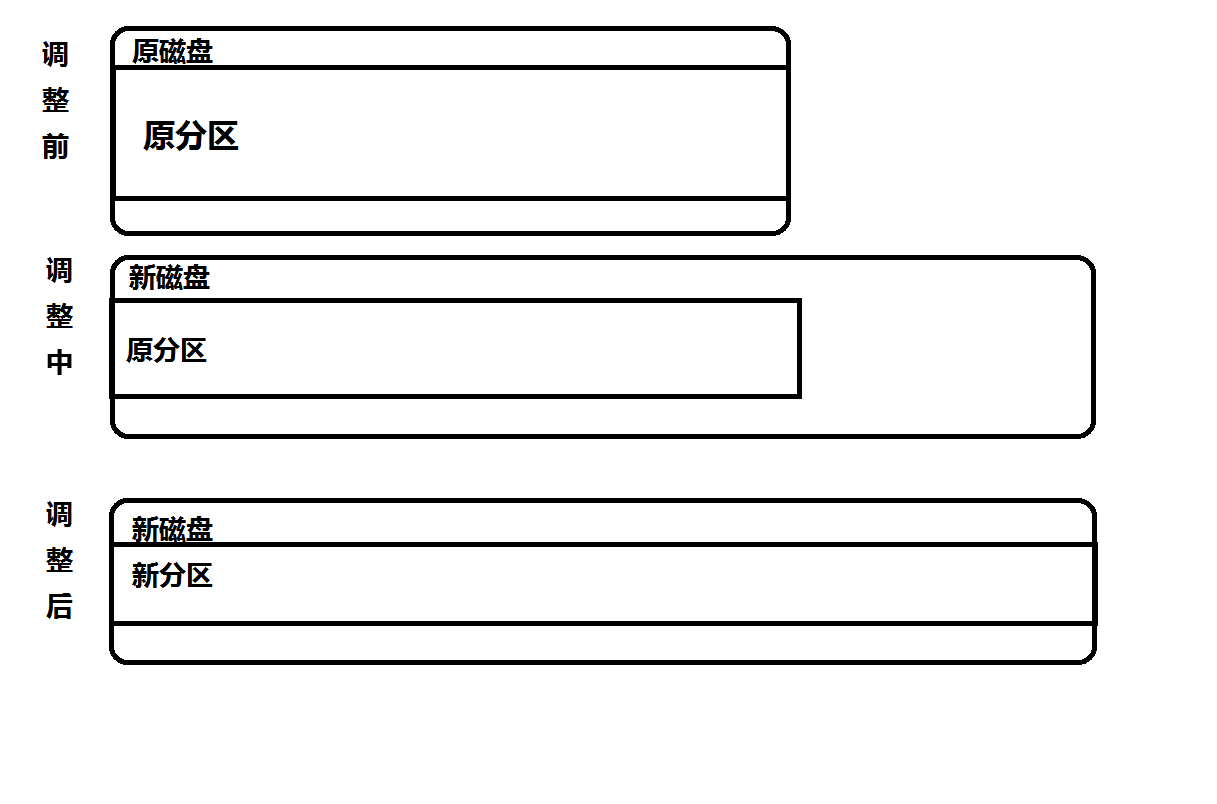
随着编译过的平台渐渐增多,openwrt的编译文件夹日渐增大,又一次把硬盘塞满了
shell> df -h
文件系统              容量  已用  可用 已用% 挂载点
/dev/data            44G  44G   0     100%  /data
但是在宿主机上还是有一些剩余空间的,这样就可以扩容
一些小提示
您需要了解一下知识点才能正确理解本文
- 磁盘并不能直接使用,磁盘要经过分区才能使用
- 磁盘大小的增大并不会影响到分区的大小
- 分区的调整要解挂载
- 分区有风险,出事我不管
镜像文件的调整大小
shell> qemu-img resize YourImageFileName +20G
                #为你的镜像文件增大20G
shell> qemu-img info YourImageFileName
                #请自行查阅info是什么意思
完成
调整分区大小
完成了上一步,分区的空间并不能有效的扩大,而是像上图 调整中 那样,需要我们在操作系统中对分区进行调整
有些人要问了:我要调整的分区是根文件系统所在的分区,咋办? –>当前系统的 USB启动盘/维护光盘
进入系统第一步:
shell> fdisk -l
Disk /dev/sdb: 64 GiB, 68719476736 bytes, 134217728 sectors
Units: sectors of 1 * 512 = 512 bytes
Sector size (logical/physical): 512 bytes / 512 bytes
I/O size (minimum/optimal): 512 bytes / 512 bytes
Disklabel type: dos
Disk identifier: 0x06424734
Device     Boot Start      End  Sectors Size Id Type
/dev/sdb1        2048 92274687 92272640  44G 83 Linux
确定对应的磁盘分区
检查文件系统是否有错误
shell> e2fsck -f /dev/sdb1 #自行替换为所需调整的分区
                           #一路y即可
Pass 1: Checking inodes, blocks, and sizes
Inode 997822 extent tree (at level 1) could be narrower.  Fix? yes
Inode 1980927 extent tree (at level 1) could be narrower.  Fix? yes
Pass 1E: Optimizing extent trees
Pass 2: Checking directory structure
Pass 3: Checking directory connectivity
/lost+found not found.  Create? yes
Pass 4: Checking reference counts
Pass 5: Checking group summary information
/dev/sdb1: ***** FILE SYSTEM WAS MODIFIED *****
/dev/sdb1: 1594738/2883584 files (0.2% non-contiguous), 10953278/11534080 blocks
进入分区软件。哪个?fdisk
shell> fdisk /dev/sdb
先按p打印一下当前分区的开始扇区,并记录
Command (m for help): p
Disk /dev/sdb: 64 GiB, 68719476736 bytes, 134217728 sectors
Units: sectors of 1 * 512 = 512 bytes
Sector size (logical/physical): 512 bytes / 512 bytes
I/O size (minimum/optimal): 512 bytes / 512 bytes
Disklabel type: dos
Disk identifier: 0x06424734
Device     Boot Start      End  Sectors Size Id Type
/dev/sdb1        2048 92274687 92272640  44G 83 Linux
然后delete掉这个分区
Command (m for help): d
Selected partition 1
Partition 1 has been deleted.
再new一个分区
Command (m for help): n
Partition type
   p   primary (0 primary, 0 extended, 4 free)
   e   extended (container for logical partitions)
Select (default p):
Using default response p.
Partition number (1-4, default 1):
First sector (2048-134217727, default 2048):
Last sector, +sectors or +size{K,M,G,T,P} (2048-134217727, default 134217727):
Created a new partition 1 of type 'Linux' and of size 64 GiB.
Partition #1 contains a ext4 signature.
Do you want to remove the signature? [Y]es/[N]o: N
这个标红的部分要注意了,什么意思百度翻译谷歌翻译都行,最后打N就行了
写入硬盘
Command (m for help): w
The partition table has been altered.
Calling ioctl() to re-read partition table.
Re-reading the partition table failed.: Device or resource busy
The kernel still uses the old table. The new table will be used at the next reboot or after you run partprobe(8) or kpartx(8).
按它所说运行一下partprobe
shell> partprobe
再次检查文件系统
shell> e2fsck -f /dev/sdb1
#同上
调整分区大小
shell> resize2fs /dev/sdb1 64G
resize2fs 1.44.1 (24-Mar-2018)
The containing partition (or device) is only 16776960 (4k) blocks.
You requested a new size of 16777216 blocks.
诶?报错了。分区只有16776960 blocks,但是64G是16777216 blocks。
。。。
那我就调整到16776960 blocks啊
resize2fs /dev/sdb1 16776960
resize2fs 1.44.1 (24-Mar-2018)
Resizing the filesystem on /dev/sdb1 to 16776960 (4k) blocks.
The filesystem on /dev/sdb1 is now 16776960 (4k) blocks long.
挂载查看
shell> mount /dev/sdb1 /data
shell> df -h
文件系统   容量   已用 可用 已用% 挂载点
/dev/data 64G   44G 20G  70% /data
另:查看UUID并写入fstab
shell> blkid /dev/sdb1
/dev/sdb1: UUID="267e3c77-56f8-4c1c-877a-ce4eb88876fa" TYPE="ext4" PARTUUID="06424734-01"
shell> vim /etc/fstab
UUID=267e3c77-56f8-4c1c-877a-ce4eb88876fa /data ext4 defaults 0 0
